
Key Installation Points for Ultrasonic Split-Type Open Channel Flowmeter with Pole-Mounted Solar Power Supply [Dayu Electronics]
Key Installation Points for Ultrasonic Split-Type Open Channel Flowmeter with Pole-Mounted Solar Power Supply
In open channel flow monitoring, the ultrasonic split-type open channel flowmeter is widely used due to its non-contact measurement, high accuracy, and other advantages. The following introduces key installation points combined with on-site pole-mounted solar power supply installation.
Pre-installation Preparation
Site Selection and Debris Cleaning
When selecting an installation point, ensure that there are no stones, aquatic plants, garbage, or other debris within 5 times the straight channel length upstream and downstream. These debris can interfere with water flow and affect measurement accuracy. For example, aquatic plants may entangle the equipment, and stones may change the flow state, leading to inaccurate measurement data. Therefore, the installation area must be thoroughly cleaned before installation.
Tools and Materials Preparation
Prepare adjustable wrench (opening greater than 18mm), pliers, Phillips screwdriver (large), flat-head screwdriver (large), 2mm screwdriver (for wiring), cable ties, corrugated conduit (20 - 30mm), diagonal cutting pliers or wire strippers, insulating tape, and other tools. Also prepare the pole, solar panel, enclosure, ultrasonic split-type open channel flowmeter, and other equipment and materials, ensuring that the equipment is intact and all accessories are complete.
Pole and Foundation Construction
Foundation Excavation
Near the selected installation point, excavate a foundation of 0.5m × 0.5m × 0.8m for concrete embedding. If the soil in the excavation area is relatively soft, the foundation must be appropriately enlarged, such as 0.8m × 0.8m × 1.0m. Reserve conduit positions nearby for wiring, with the conduit directed toward the river channel where the ultrasonic split-type open channel flowmeter is installed.
Installing the Anchor Cage and Pouring Concrete
The anchor cage adopts a foldable design, and it must be unfolded and trimmed before installation. When pouring concrete, first pour a portion, compact it evenly, then place the anchor cage, ensuring that the top screws of the anchor cage extend out or are flush with the foundation surface. Bricks or stones can be placed at the bottom to prevent the anchor cage from sinking in the concrete. Wrap the threaded holes on the top of the anchor cage with tape or plastic bags to prevent concrete from sticking to the threads during pouring, which could affect screw tightening. The concrete must be thoroughly compacted, the anchor cage must not be tilted, and the concrete surface must be sufficiently level; otherwise, it will affect pole installation and cause the pole to be not vertical.
Pole Installation
Pole installation requires 2 or more people working together. Align the 4 screw holes at the base of the pole with the 4 screws of the anchor cage. One person holds the pole, and another installs the base screws. Install all 4 screws first, then tighten them gradually in sequence. If the pole is tilted, place shims at the base to ensure the pole is vertical.
Solar Panel and Enclosure Installation
Solar Panel Installation
First, fix the solar panel bracket to the base of the pole without tightening the U-bolt screws. Then slowly move the solar panel up to the installation position 0.3 - 0.5m from the top of the pole. Adjust the orientation, preferably facing south; if the environment is restricted, at least face southwest, and never face north. Then tighten the U-bolt screws.
Enclosure Installation
First, assemble the enclosure at a position where a person can easily install it. Attach the stainless steel hose clamps without tightening them, allowing the enclosure to move up and down. Then move the enclosure to a position above the wiring hole in the middle of the pole, adjust the direction (for convenient maintenance access), and tighten the clamp screws. Be careful not to scratch the pole's surface paint during movement.
Ultrasonic Split-Type Open Channel Flowmeter Installation
Probe Installation
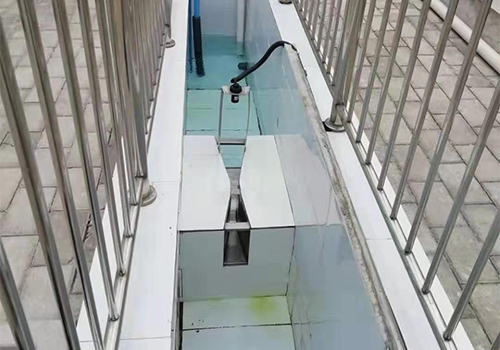
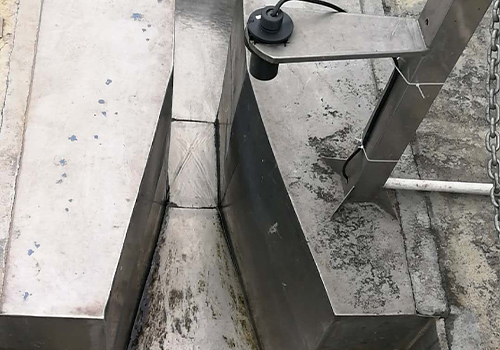
The probe installation should be carried out according to specification requirements. Before installation, ensure that the probe and bracket are firmly installed with no looseness. Any looseness after installation will cause the reference point on the water surface to shift, thereby affecting measurement accuracy. When installing the probe, keep it perpendicular to the water level and avoid tilting. For different types of weirs and flumes, the probe installation position also varies. For example, when measuring water flow, for triangular and rectangular weirs, the probe should be installed upstream of the weir plate, at a distance roughly 3 - 4 times the maximum head over the weir; for Parshall flumes, the installation position is at 1/3 of the inlet converging section.
Main Unit Installation
The flowmeter main unit should be installed indoors in a well-ventilated area free of corrosive gases. If it must be installed outdoors due to special circumstances, the instrument enclosure must be protected. When using the instrument for the first time, input the actual engineering parameters into the main unit, confirm the probe model, set the sound speed, signal type, and corresponding weir/flume type, and correctly set the instrument's water level-flow rate table.
Debugging and Acceptance
Parameter Setting and Debugging
After installation, configure the parameters of the ultrasonic split-type open channel flowmeter, including pipe outer diameter, pipe wall thickness, pipe material, lining material parameters (if any, including lining thickness and lining sound speed), fluid type, probe type, and probe installation method. After configuration, perform debugging to check whether the equipment operates normally and whether measurement data is accurate.
Acceptance
Check whether the pole is vertical, whether the solar panel and enclosure are firmly installed, and whether the probe and main unit of the ultrasonic split-type open channel flowmeter meet specification requirements. In addition, conduct a period of operational testing to observe whether measurement data is stable and whether any abnormalities occur. If everything is normal, the acceptance passes.
Through the above steps, the quality of the ultrasonic split-type open channel flowmeter pole-mounted solar power supply installation can be ensured, providing accurate and reliable data support for open channel flow monitoring.